Thursday, September 24, 2009

What Do You Do with 10 Lbs. of Carrots?

Shred them.

Stare at them.

Finally make something.

And maybe, just maybe, the construction workers next door that you take some warm carrot cookies to will give your little helpers a couple bucks to spend.

Here's the awesome recipe: lots of carrot, fall spices, raisins, and oats. Of course I contributed to the "less sugar than called for" and added white whole wheat flour. A great fall snack for you and your kiddies.


Ingredients

  • 1 cup packed light-brown sugar (I used 1/2 to 3/4 c.)
  • 1 cup granulated sugar (I used 1/2 to 3/4 c.)
  • 1/2 pound (2 sticks) unsalted butter, room temperature
  • 2 large eggs, room temperature
  • 1 teaspoon pure vanilla extract
  • 2 cups all-purpose flour (I put half whole wheat flour in)
  • 1 teaspoon baking soda
  • 1 teaspoon baking powder
  • 1/4 teaspoon salt
  • 1 teaspoon ground cinnamon
  • 1/2 teaspoon ground nutmeg
  • 1/2 teaspoon ground ginger
  • 2 cups old-fashioned rolled oats
  • 1 1/2 cups finely grated carrots, (about 3 large carrots)
  • 1 cup raisins

Directions

  1. Preheat oven to 350 degrees. Line two baking sheets with Silpat baking mats or parchment paper, and set aside. In the bowl of an electric mixer fitted with the paddle attachment, combine sugars and butter; beat until light and fluffy, 3 to 4 minutes. Add eggs and vanilla, and beat on medium speed until well combined.
  2. In a large bowl, sift together flour, baking soda, baking powder, salt, cinnamon, nutmeg, and ginger; stir to combine. Gradually add flour to butter mixture; mix on a low speed until just blended. Mix in oats, carrots, and raisins. Chill dough in refrigerator until firm, at least 1 hour.
  3. Using a 1/2-ounce ice-cream scoop, scoop dough onto prepared baking sheets, leaving 2 inches between cookies. Transfer to oven, and bake until browned and crisped, rotating pan halfway through baking to ensure even color, 12 to 15 minutes. Transfer to a wire rack to cool. Repeat baking process with remaining dough.
(Recipe courtesy MarthaStewart.com)

Friday, September 18, 2009

A Day in the life of...

With so many meals and snacks served up in a day of a bustling household, I thought I'd give you peak into our food world, on a random day of the week: Thursday.

After a typical egg/toast breakfast and morning baby-feedings, the girls and I make these awesome whole grain cookies (which will now replace our standard chocolate chip cookie. Bonus? Check out the nutritional facts at the end.)

"Nutty for Oats Cookies"

2/3 creamy peanut butter
4 tablespoons unsalted butter, softened
3/4 cup packed light or dark brown sugar
1 teaspoon vanilla extract
1/2 teaspoon salt
1/4 teaspoon baking soda
2 large eggs
1 cup rolled oats, ground for 30 seconds in a food processor
1 1/2 cups rolled oats
2 cups bittersweet chocolate chips

Preheat oven to 350ยบ. Lightly grease 2 baking sheets or line with parchment paper.

(Grinding the oats which will become the flour adds so much more flavor and texture to the cookie than ordinary flour.)

Cream the peanut butter, butter, sugar, vanilla, salt and baking soda in a medium bowl. Beat in the eggs, scraping the bowl once they're incorporated, then the ground oats, old fashioned rolled oats and chocolate chips. Drop the dough by tablespoonfuls onto the prepared baking sheets.

Bake the cookies, reversing pans midway through (top to bottom, bottom to top), until they're barely set and just beginning to brown around the edges, 11 to 13 minutes. Remove the cookies from the oven and let them cool completely on the pans.

Nutritional Information per cookie: 7g whole grains, 131 cal, 7g fat, 3g protein, 5g complex carbs, 10g sugar, 1g dietary fiber (my MC says 2), 14mg cholesterol, 64mg sodium, 99mg potassium, 14RE vitamin A, 1mg iron, 11mg calcium, 62mg phosphorous, 7mg caffeine.


(Babies shootin' the breeze in the kitchen while we bake.)

Lunch: Chicken Salad Wraps

Chicken shredded (we use Costco's premium canned chicken--excellent!), mayo, 2 TBSP prepared pesto, 1/2 c. chopped sun dried tomatoes (in oil), Italian seasoning, onion powder, and salt and pepper, to taste.

Then we wrapped a thin layer of the chicken salad in flat bread wraps,

added apple slices and our favorite chips (that's for another post),

and you have a break from the everyday ham, tomato and cheese sandwich.


Lastly, dinner.
One of my favorite fall dinners to bring in the new season: pumpkin soup.

Here is the recipe from the top of my head which is the "doubled" version so you can freeze the rest for a colder wintry day.


Pumpkin Soup

(Serves 8-9)

1 really large onion, chopped (or two large)
4 c. pumpkin puree
1 tsp. curry powder
5 c. chicken broth
1/4 c. butter
1/8 c. olive oil
3 tsp. salt
3 c. heavy cream
1 c. milk

Saute onions in both the butter and oil. (You always want to saute in both butter and oil for optimal flavor.) Once they are translucent, add the curry.

Add the pumpkin and salt and remove from the stove. Puree the mixture in a blender or food processor. Bring back to a stock pot and add the stock until warmed. Finally add the cream and milk until also warmed and serve.

To garnish: a dollop of sour cream and a dash of cinnamon. Children are the most excited about the add-ons in any soup. Let them help serve.


There you have it: happy faces and satisfied tummies. Another day gone and another to create.

Thursday, September 10, 2009

The last of Summer's Crop

After being inspired by earth's bounty through most of my senses, there was one remaining. And this dish was served up to satisfy, now, all of my senses.

Ingredients

  • 4 cups chopped yellow onions (3 onions)
  • 1/8 cup good olive oil
  • 1/8 cup minced garlic (2 cloves)
  • 2 red bell peppers, cored, seeded, and large-diced
  • 21 yellow bell peppers, cored, seeded, and large-diced
  • 1 teaspoon chili powder
  • 1 teaspoon ground cumin
  • 1/4 teaspoon dried red pepper flakes, or to taste
  • 1/4 teaspoon cayenne pepper, or to taste
  • 2 teaspoons kosher salt
  • 2 (28-ounce) cans whole peeled plum tomatoes in puree, undrained
  • 1/4 cup minced fresh basil leaves
  • 5-6 cooked chicken breast cut into strips
  • Freshly ground black pepper

For serving:

  • Chopped corn chips, grated cheddar, sour cream

Directions

Cook the onions in the oil over medium-low heat for 10 to 15 minutes, until translucent. Add the garlic and cook for 1 more minute. Add the bell peppers, chili powder, cumin, red pepper flakes, cayenne, and salt. Cook for 1 minute. Crush the tomatoes by hand or in batches in a food processor fitted with a steel blade (pulse 6 to 8 times). Add to the pot with the basil. Bring to a boil, then reduce the heat and simmer, uncovered, for 30 minutes, stirring occasionally.

Add cooked chicken to the chili and simmer, uncovered, for another 20 minutes. Serve with the toppings, or refrigerate and reheat gently before serving.


Adapted from Barefoot Contessa's Chicken Chili

Tuesday, September 8, 2009

If You Really Like Pecans


These Pecan Squares are one of our family's favorite treats that we make only for special occasions, probably because it calls for so many pecans. They are chewy, crunchy, and intense with flavor from the shortbread crust and honey-brown sugared pecan topping.

The recipe makes a ton which is one of the many reasons I love them. Count on using a full pan of these for multiple entertaining events you may have in a row. Or enjoy them as a family for a long week!

Ingredients

Crust:

  • 1 1/4 pounds unsalted butter, room temperature
  • 3/4 cup granulated sugar
  • 3 extra-large eggs
  • 3/4 teaspoon pure vanilla extract
  • 4 1/2 cups all-purpose flour
  • 1/2 teaspoon baking powder
  • 1/4 teaspoon salt

Topping:

  • 1 pound unsalted butter
  • 1 cup good honey
  • 3 cups light brown sugar, packed
  • 1 teaspoon grated lemon zest
  • 1 teaspoon grated orange zest
  • 1/4 cup heavy cream
  • 2 pounds pecans, coarsely chopped

Directions

Preheat the oven to 350 degrees F.

For the crust, beat the butter and granulated sugar in the bowl of an electric mixer fitted with a paddle attachment, until light, approximately 3 minutes. Add the eggs and the vanilla and mix well. Sift together the flour, baking powder, and salt. Mix the dry ingredients into the batter with the mixer on low speed until just combined. Press the dough evenly into an ungreased 18 by 12 by 1-inch baking sheet, making an edge around the outside. It will be very sticky; sprinkle the dough and your hands lightly with flour. Bake for 15 minutes, until the crust is set but not browned. Allow to cool.

(Eat a little dough, here and there...)

For the topping, combine the butter, honey, brown sugar, and zests in a large, heavy-bottomed saucepan. Cook over low heat until the butter is melted, using a wooden spoon to stir. Raise the heat and boil for 3 minutes. Remove from the heat. Stir in the heavy cream and pecans. Pour over the crust, trying not to get the filling between the crust and the pan. Bake for 25 to 30 minutes, until the filling is set. Remove from the oven and allow to cool. Wrap in plastic wrap and refrigerate until cold. Cut into bars and serve.

(Recipe courtesy of Barefoot Contessa)

Tuesday, August 18, 2009

Beat the Heat with Frozen Fruit

For a mere $3 plus change, you can buy popsicle molds (I got mine at Target) and enjoy the rest of the summer by making your own frozen treats.

Compare homemade popsicles, of simply pouring your favorite juice into a mold and freezing to these store bought, more expensive pops.

Ingredient statement to homemade popsicles: apple juice. (Cranberry and orange are some of our favorites.)

Ingredient statements to Otter Pops:

And the typical Popsicle brand pop:


A juice pop you make:

1 ingredient (from nature)
Natural sweetener
Offers other nutrients (like O.J.'s vitamin C, calcium, and iron)


Store bought (comparing last popsicle):

17 ingredients!
3 different sweeteners, 2 in which are cheap and less natural
Any popsicle with flavors like "cotton candy" should cause you to stop and reflect.

Start a new tradition of including your kids in choosing and pouring the juice. I can tell you that it delights kids in watching the transformation of juice into a frozen treat. Once again, being creative usually brings bonding, memories, and a few extra dollars in your pocket by the end of summer.

Friday, August 14, 2009

The Glorified Leftover

In an attempt to explore our world culturally, we had a French dinner the other night.

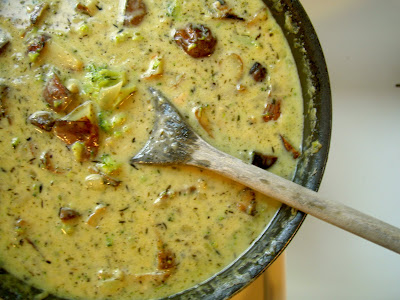
Homemade crepes with Bobby's grilled chicken, broccoli cream sauce to fill. Very decedent.
The kids loved watching me fill each crepe slightly, smoothing around to cover, and gently rolling it before placing it in front of them to try.

(Dessert, of course, were crepes with the ever so gently applied Nutella- that chocolate hazelnut goodness. That stuff is definitely for another post!)

The best part? With so much leftover filling, the following night I threw in the leftover roasted herb potatoes, chopped, a little more milk and chicken broth, and Voila! An awesome hardy, quite flavorful soup/chowder.

Because the chicken had been grilled, potatoes roasted, there was an elevated level of flavor when combined in the soup and allowed to simmer together.


Think beyond tonight's dinner. Can you take one more step in it's prep to transform the leftovers tomorrow night?

Tuesday, August 11, 2009

Create An Edible Still Life


If you've ever studied art history, you would remember the redundant studies on fruit as still life. Above Picasso, Manet, Van Gogh and, my favorite, Cezanne, turn the ordinary into artful masterpieces.

In our house, maybe because I am an art history major, I like to do the same, without all of the acrylic paint, that is.


It is tradition here that after buying produce we arrange the rainbow of goodness onto a white platter. (White serving dishes are best to show off food--think of all the fancy restaurants you've been to; they always serve on white dishes.)
The kids get involved in unwrapping each category of fruit and displaying it, while I make sure the more tender fruit/veggies are on the top of the arrangement. Fruit gets one platter, vegetables, another.

This simple activity does a couple things:
  1. it provides variety in shapes, colors, textures for children to explore
  2. on a beautiful platter it becomes a handmade centerpiece inspired by you and your children
  3. placed on a table within reach will invite children to pick their fancy for snack time
  4. it truly does become living artwork for your family to enjoy the earth's bounty year round
  5. being constantly exposed to vegetables allows you to cook them with less resistance from your children as they "bond" with them all day